In this blog post, I will show you how to create flows for some of the most common email scenarios in Power Automate. Power Automate is a Microsoft service that lets you automate tasks and workflows across different applications and services. With Power Automate, you can create flows that trigger actions based on events or conditions in your email inbox. For example, you can create a flow that automatically saves email attachments to OneDrive, or a flow that sends a notification to Teams when the 365 form is submitted. I personally learned this tool while making a new user form from a Form for HR to fill out. Then based on the conditions, notified the different teams and sent a welcome letter to the new hire’s personal email. These flows can help you save time and stay organized with your email communication.
In this blog post, I will cover the following scenarios:
– How to create a flow that saves email attachments to OneDrive
– How to Create a Microsoft To-Do task for important emails and send a notification
– How to create a flow that creates a task in Planner when you flag an email
How to create a flow that saves email attachments to OneDrive
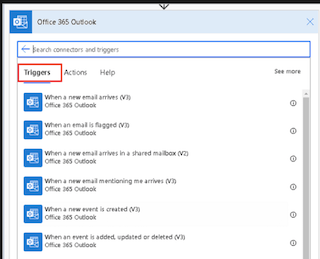
1. Go to https://flow.microsoft.com and sign in with your Office 365 account.
2. Click on Templates and search for ““Save Office 365 email attachments to specified OneDrive for Business folder”.
3. Select the template and click on Continue.
4. Review the connections and permissions and click on Create.
5. Edit the flow as needed. You can change the plan, bucket, and task details.“
How to Create a Microsoft To-Do task for important emails and send a notification
1. Go to https://flow.microsoft.com and sign in with your Office 365 account.
2. Click on Templates and search for “Create a Microsoft To-Do task for important emails and send a notification”.
3. Select the template and click on Continue.
4. Review the connections and permissions and click on Create.
5. Edit the flow as needed. You can change the plan, bucket, and task details.“
How to create a flow that creates a task in Planner when you flag an email
1. Go to https://flow.microsoft.com and sign in with your Office 365 account.
2. Click on Templates and search for “Create planner task for flagged emails in Office 365”.
3. Select the template and click on Continue.
4. Review the connections and permissions and click on Create.
5. Edit the flow as needed. You can change the plan, bucket, and task details.
6. Save the flow and test it by flagging an email in Outlook.
I will also share some tips and best practices for creating and managing your email flows in Power Automate. Let’s get started!
Hi, thanks for this. For “How to create a flow that creates a task in Planner when you flag an email,” how can I structure it so that a new Planner Task card doesn’t get created each time someone replies or forwards the original email? I can’t use a rule that says “exclude RE: or FWD:” in the subject like because in some cases, the first email receipt to my group email address may already contain those words. Thanks